Tuesday, March 4, 2014

Baked Jerusalem Artichokes with Bread Crumbs, Thyme and Lemon

IMG_0435

I overheard a woman in the school yard yesterday saying how she was so bored with winter that she couldn't even find anything she wanted to eat.  It's easy to feel that sense of malaise in March, when winter feels interminable.  There may be a few more solid weeks of cold, so I'm trying to use this time to eat some really delicious warming foods.  Before long we will all be basking in the possibilities of really fresh salads and a new crop of Spring fruits and vegetables.

Sunroot, Jerusalem Artichoke, aka sunchoke.  It's not an artichoke, but it kind of tastes like one.  It's worth seeking it out and making this gratin before this winter passes us by, which surely it will.

IMG_0446

As tubers go, this one is pretty special, coming from a sunflower. Knobby like ginger, so it takes some persistence to peel.  But a little stick-to-itiveness sometimes makes a dish even more rewarding. 

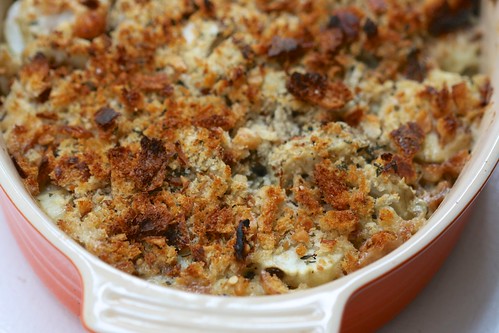
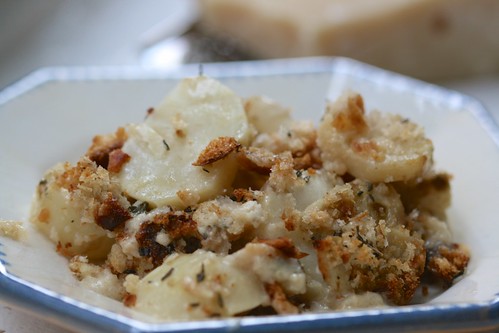
Baked Jerusalem Artichokes, Bread Crumbs, Thyme and Lemon
From Jamie Oliver

This would be a great accompaniment to any roast meat or broiled fish. Don't slice the artichokes too thick or you will wind up baking the dish a lot longer than 30 minutes.

Serves 4-6
1 ⅓ cup heavy cream 
juice of 1 lemon
2 cloves of garlic, peeled and finely chopped
1 good handful of fresh thyme, leaves picked from stems and chopped
3 handfuls of grated Parmesan cheese
salt and freshly ground pepper
2 ¼ lbs Jerusalem artichokes, peeled and sliced as thick as a pencil
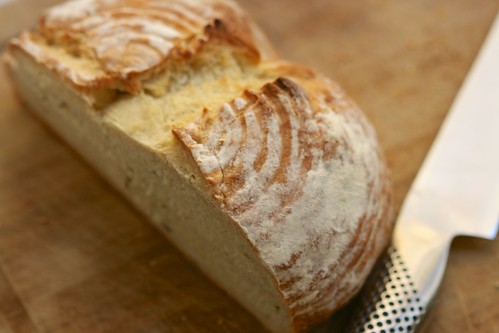
2 good handfuls of fresh bread crumbs (I made mine in a food processor using rosemary sourdough bread)
olive oil

Preheat your oven to 425 F.  In a bowl, mix your cream, lemon juice, garlic, half the thyme and most of the Parmesan and season well to taste.  Throw in the sliced Jerusalem artichokes.  Mix well and place everything in an ovenproof baking dish. 

Mix the breadcrumbs with the rest of the thyme and Parmesan and some salt and a little olive oil.  Bake in the oven for around 30 minutes, until the artichokes are tender and the bread crumbs are golden.  

Wednesday, February 26, 2014

Chocolate Chia Pudding

IMG_0424

Since December I've been turning to the same list of characters:  fish pie, shepherd's pie, soups, stews, casseroles and all other forms of warming, comfort foods.  To brighten things up, I rely heavily on citrus, namely navel orange segments and those luscious satsumas.  A vinegary kale salad from time to time also helps distract from the winter doldrums.

Chocolate is playing a starring role for me this winter.  Sometimes chocolate chips are snuck in greedy handfuls.  Then came a decadent treat in the form of Valentine's chocolates from Jaques Torres.  And finally, I tried my hand at a chia pudding, stirring in some rich bakers cocoa and topping it with raw cacao nibs.  Little treats come in many forms.

Chocolate Chia Pudding
Inspired by this recipe from Simple Bites
This is where healthy 'super food' meets indulgence.  I also made a breakfast version of this, substituting the chocolate for some cinnamon and nutmeg.  It's effortless to make- just combine the ingredients in a jar and shake it up, then chill for 4 hours, or overnight.  My version uses whole milk, because that's what we drink.  But this will work with any milk, including non-dairy nut milks or soy/rice milk.

⅓ cup chia seeds (I used black chia seeds)
1 ½ cups whole milk (or whatever type of milk you drink)
2 tablespoons maple syrup
1 teaspoon vanilla extract
2 tablespoons baking cocoa
Cacao nibs, optional

Combine all the ingredients in a pint jar.  Cover it with a lid and shake vigorously.  Chill for about an hour, then shake the jar again.  Let it chill for at least four hours or overnight.  Sprinkle with cacao nibs or shaved chocolate, or eat it as is.


Wednesday, January 29, 2014

Chocolate Mascarpone Icebox Cake

IMG_0409
There is something about the way the mascarpone enriches the heavy cream, and softens the chocolate wafers without making them soggy... it's enough to make even this bitter winter fade away for just a while, leaving me fully content with this one perfect (yes, perfect) thing.

IMG_0421


Chocolate Mascarpone Icebox Cake
Adapted from The Magnolia Bakery Cookbook and Ina Garten's icebox cake

I made two of these recently for a friend's 1940's themed 40th birthday.  I used two springform pans like Ina Garten does, to be sure they would be neatly and safely transported via taxi cab.  But I admit I like the looks of this free-form somewhat messy cake, stacked just slightly off kilter.  Any cream you happen to have left over should go on top of a rich cup of hot chocolate.

2 cups heavy cream
8 ounces mascarpone
1 teaspoon vanilla
½ cup sugar
1 teaspoon instant espresso powder
2 tablespoons unsweetened cocoa powder
1 ½ packages Nabisco chocolate wafer cookies

In a large bowl whip the cream, mascarpone, vanilla, sugar, espresso powder and unsweetened cocoa powder until soft peaks form, being careful not to over whip.  To assemble the cake, on a flat plate at lease 9 inches in diameter, arrange seven chocolate wafers, with one wafer in the center and six wafers surrounding it.  Scoop about ¾ cup of cream onto the wafers, and holding them securely in place, gently spread the cream on top of them.  Continue to layer the wafers and the cream, making sure to end with a whipped cream layer on top.  Refrigerate for at least 5 hours, or overnight before cutting and serving.  Shave some good dark chocolate over top for a garnish.  

Wednesday, December 18, 2013

How to taste bread

IMG_0352 

 My friend's father was a baker.  I love how she describes the way he tasted bread.

"He would look at it, touch it, smell it, and then taste it... then look at it again," she said, tilting her head back the way he probably did, contemplative.  She had a serious look about her, considering the bread, lost in remembrance.

I could feel her longing for her father, but she seemed comforted, talking about him while she tasted a slice of my freshly baked loaf.  It reminded me of watching my mother adeptly forming rolls or a braided bread.  Or how as kids she took us in our pajamas to the Rockland Bakery in the wee hours because that was how much she loved their bread. Those details about a person that we hope remain engraved somewhere permanent.  And as for the bread, perhaps it helps us hold on.

 IMG_0357

Rosemary Boule
Makes one loaf. It is excellent as toast on the second and third day.

¾ cup water
2 teaspoons yeast
1 teaspoon sugar
1 teaspoon salt
2 to 2 ½ cups all purpose flour
2 tablespoons olive oil
2 teaspoons dried rosemary
cornmeal for dusting the pan

Combine ¾ cup warm water with 2 teaspoons of active dry yeast and one teaspoon of sugar.
Allow to proof for several minutes.
Measure 2 cups all-purpose flour into a mixing bowl, along with 1 teaspoon of fine salt, 2 tablespoons of olive oil and 2 teaspoons of crumbled, dried rosemary.  Stir to combine.  
Add the yeast mixture to the flour and stir with a wooden spoon.
Turn this out onto a clean but floured countertop and knead for 3-4 minutes, adding in additional flour as needed until the dough is not too sticky but not too firm.  
Oil the same mixing bowl with olive oil and put the dough in the bowl to rise, covered with a dish towel, for about an hour.
Punch down the dough.  If you have a banneton, you can use it for the second rising, also an hour.  Without a banneton, form the dough into a round loaf and let it rise on a baking sheet coated with corn meal.
Bake in a preheated 425 degree oven for about 20 minutes.  The loaf is done when it sounds hollow when tapping on the bottom.

Wednesday, November 27, 2013

Libby's Hot Waffles

Libby's Waffles

I've had this image in my head lately of the 1950's housewife.  For background, I've been stuck inside for six days with a sick child, vacuuming copious amounts of NYC dust like crazy, reaching into my secret stash of chocolate (my version of mommy's little helper.)  But this morning it seemed we had all turned a corner.  Cheeks were rosy again, spirits were higher, and I thought of making waffles.  Instead of our usual, whole wheat, flax-filled waffles, I pulled out my tattered copy of the Good Housekeeping Cook Book that belonged to my Grandmother.  There, circled in purple pen by my own mother, was the waffle recipe I remember from my childhood.

And for the first time, my little family happily gobbled up white waffles- just regular flour, sugar, butter, eggs and milk.  Boy were they good.  Then, to redeem my feelings of failure over having reached the end of my rope a couple times over the last few days, I pulled out the glue and glitter and built my kids a Broadway Local train.  

The R Train

I've listened to other mom's lament that they lost part of their identity when they chose to stay home with their kids.  I can't look at things in that light.  Learning to be a mother and to organize and protect and wipe noses and shlep, I gained a whole new identity, certainly.  It's not all about flax and veggies and overachieving.  What will these boys remember about these years together?  I guess when we judge the adults who raised us, it's best to think that we all do our best.  And hopefully, we remember eating well.

Libby's Hot Waffles
Adapted from GoodHousekeeping Cookbook copyright 1955
Makes 4-6 waffles.  We prefer real maple syrup.  You can follow the steps below, which I copied from the cookbook, or I find the recipe works just as well if you throw all the ingredients into a blender, saving time and energy!

1 ½ cups sifted all purpose flour
3 teaspoons double acting baking powder
½ teaspoon salt
2 teaspoons sugar
1 to 1 ½ cups milk (I use 1, but you can use an additional ½ cup for a more liquid batter)
2 eggs, separated
¼ cup melted butter

1. Start heating waffle iron.
2. Into large bowl, sift flour, baking powder, salt, sugar.
3. Slowly stir in milk, beaten egg yolks, then melted butter.
4. Beat the egg whites stiff, then fold in to batter.
5. Pour batter into center of lower half until it spreads about 1" from edges. Bring cover down gently. Do not raise the cover while baking.
6. When waffle is done, lift cover, loosen waffle with fork, serve at once.  

Wednesday, October 23, 2013

Pumpkin Waffles

IMG_0236

Mornings we rise early, in the dark.  Famished, thirsty. Full of anticipation for another day to begin. Dogs bark, trucks roar, the street sweeper whirrs, the garbage trucks open and close their huge crushing jaws.  We are not alone in the city that never sleeps.  Certain things are predictable and even wonderful. The city wheels go round this way.

IMG_0211

I try to remind myself to embrace these painfully early hours as part of the natural rhythm of our life right now.  Change what we can, accept what we can't change.  Eating good things, especially with a good dose of pure maple syrup, helps.  Wholesome, freshly pureed pumpkin makes me feel I've gone the extra mile for all of us. A little care for the caregiver.
IMG_0220

Pumpkin Waffles
Makes 4 to 6 waffles, depending on size.

1 1/2 cups all purpose flour (sometimes I use white-whole-wheat flour)
2 teaspoons baking powder
1 teaspoon cinnamon
2 eggs
3/4 cup milk
1/4 cup melted butter or olive oil (if you use olive oil, add 1 tablespoon sugar to the mix)
1 cup pumpkin puree (homemade or canned is fine...)

In a medium bowl, combine flour, baking powder, cinnamon and stir with a whisk.  Beat the eggs and add them to the dry ingredients along with the milk and butter or oil.  Stir in the pumpkin and combine well.  Heat up your waffle iron and go to it!  Serve with real maple syrup.

Saturday, October 12, 2013

Green with Envy

IMG_0193

I've been on a calzone-making kick for about six months.  When I discovered it was an easy way to get Roman to eat greens, calzone became part of my dinner rotation.  I love picking him up from school and hearing his excitement when I tell him what's for dinner.  

Calzone are also great for lunch, even at room temperature, when we're too busy playing outside in the beautiful Fall weather to come home. A woman at the park asked me where I had bought them, and when I replied I had made them, she acted like I was bragging (no judgement, but her own child was enjoying a Happy Meal). "This is what I do, I can teach you, if you want" I told her, playing it down.  There is a perception that making your own dough is hard.  Time consuming, maybe, but hard, not particularly.  It all depends on what you want to do with your time.

IMG_0199

Lately, I've been putting more energy into making things from scratch.  If you read labels, even when you think you're buying something "healthy," there are still a lot of additives, and usually I don't know what they are or why they are in there.  I love the control of preparing something myself, even if it means coming home an hour early from the park, or a few extra dishes to wash.  It's worth it to me.  And secretly, well, maybe part of me enjoys being called a show off.  There are worse things, for sure.

Healthy Green Calzone
Makes 6 large calzone.
I adapted this recipe from one my mother used to make.  She used ricotta and spinach, which is creamy and decadent.  Lately, I have been using 4% cottage cheese, and a trio of spinach, kale and broccoli.  It makes me a little giddy to see Roman gobble it up.  He loves to dip his in marinara or pasta sauce.

The dough:
1 packet active dry yeast
1 cup lukewarm water
2 teaspoons honey or maple syrup
1 1/2 teaspoons salt
1 1/2 cups unbleached white flour
1 1/2 cups whole wheat flour
3 tablespoons olive oil

Combine the yeast, water and honey in a large bowl.  Stir, then let it sit for 5 minutes.
Beat in salt and flours.  Use a wooden spoon until it is too thick to mix, then turn it out onto a floured countertop.  Knead until smooth, about 3 - 5 minutes.
Grease the same large bowl with olive oil.  Return the dough to the bowl and make turn the dough to coat it with olive oil.  Cover the bowl with a dish towel and let the dough rise in a warm place until doubled in bulk, about 1 hour.

Prepare the filling while the dough rises.

Punch the dough to deflate it and turn it out onto the floured countertop.  
Divide it into 6 equal parts and knead each part into a ball.  
Roll each ball into a circle about 1/8 inch thick.  Place 1/6 of the filling onto one side of the circle.  Bring the other side of the dough over the top of the filling and seal the edges, pressing down with the tines of a fork.  Prick the top with a fork to allow steam to release while cooking.  Place it on a greased baking tray.

Bake for 20 minutes at 450 degrees and serve, with marinara or pasta sauce for dipping.


The filling:
1/2 a yellow onion, finely diced
2 cloves of garlic, diced
3 cups of fresh baby spinach, roughly chopped
1 cup broccoli florets, cut into tiny pieces (I did not use the stalk).
1 cup of kale, center stalk removed, finely chopped
1 cup 4% cottage cheese
1 cup shredded mozzarella cheese
1/4 cup grated parmesan

In a large pan, heat some olive oil and sauté the onion and garlic for a few minutes over medium heat.  Add the greens and 1/4 cup water and cover.  Cook until the greens wilt, then uncover the pan to evaporate the water.  Turn off the heat and add the cheeses.  


Related Posts Plugin for WordPress, Blogger...