Tuesday, April 8, 2014

55 Forsyth

IMG_0484

Today I went in search of my great grandmother Molly, the one who used to make Baked Barley with Mushrooms.  I pushed Ethan in his stroller through the streets of lower Manhattan while he slept, and there, at the foot of the Manhattan Bridge I came upon a forgotten corner of the city where she used to live in 1911 at age 20.  The original building is not there anymore.  There's a small parking lot, some Chinese men smoking and spitting in the street.


IMG_0491

For a little while I walked in her footsteps.  That woman I've never met, who died long before I existed.  Maybe her DNA is responsible for my long fingers and toes or my rare blood type.  Maybe her composition is why I have never broken a bone.  Perhaps she is the reason I love pumpernickel. 

IMG_0487

Today, on my walk, I could see things in the grand scheme.  I think it's important not to forget.  Even though I never knew her, and know almost nothing about her.  It doesn't matter though.  Molly came long before me, and three generations later, I'm here because of her.

IMG_0489
Next door, looks like an original building.
So even if all I do is make her barley with mushrooms, or maybe a rice pudding (certainly she ate that too) I will think of the strong women who came before me.  They lived harder lives than me, there is no doubting that.  I think that means I can rise to the challenge.

IMG_0490
In Molly's time this was a Jewish Synagogue.  It's now a Greek Orthodox Church.

Monday, April 7, 2014

A Plan

IMG_0467


I remember Jean-Philipe, a Parisian I worked for when I was 20, laughing when I told him about my "plans."   Who knows what I was dreaming up at that age, but I had enthusiastically spelled it out with confidence for him.  "You can't plan life," he told me! 

He was mostly right.  I just sort of fell, or stepped, or leaped into several fortuitous situations in my young adult life, and kept moving ahead on my path. Still, I've kept on planning all these years, maybe it's the eternal optimist in me.   I make mental lists and day dream and somehow put one foot in front of the other and these lists get completed and my dreams become reality, well, sometimes.  

No, you can't plan whether your plane will arrive on time, or how you'll end up in another 20 years time.  But there's a lot you can plan, and count on.  Like what's for dinner all week, or more importantly, dessert.  So instead of flying by the seat of my pants,  I like to know that I'm never more than ten minutes away from a freshly baked cookie.  And this is how I do it.  With a plan, and some strategically frozen cookie dough.

Chocolate Chip Cookies with a hint of Coconut
Adapted from a David Lebovitz recipe

This dough can be frozen for up to a month (but I've left it longer and it's been fine, not to mention a nice surprise).  I usually prefer a cookie with lots of nuts but I sometimes bake them without, to accommodate my toddler who still gets frustrated with walnuts.  I like to substitute coconut palm sugar for a "healthier" cookie.  And I usually skimp on the amount of regular sugar, since most cookies taste too sweet for me.  But I've given Lebovitz's amounts below.  

Makes about 3 dozen

2 ½ cups all-purpose flour
¾ teaspoon baking soda
⅛ teaspoon salt
1 cup unsalted butter, at room temperature
1 cup packed light brown sugar (I prefer less)
¾ cup granulated sugar (I substituted coconut palm "sugar")
1 teaspoon vanilla extract
2 large eggs, at room temperature
¼ cup- ½ cup unsweetened shredded coconut
2 cups walnuts, toasted and coarsely chopped (optional)
14 ounces semisweet chocolate chips

In a small bowl, whisk together the flour, baking soda, and salt.
In a stand mixer fitted with the paddle attachment (or in a bowl by hand) beat together the butter, sugars and vanilla on medium speed until just smooth.
Beat in the eggs one at a time until throughly incorporated, then stir in the flour mixture, followed by the coconut, nuts (if using) and chocolate.

On a lightly floured surface, divide the dough in half.  Shape each piece into a log (resembling a 12 inch long baguette) and wrap in plastic wrap.  Refrigerate until firm (or freeze at this point for later use).

Preheat your oven to 350.  Line a baking sheet with parchment paper.  Slice the logs into ¾ inch disks and place them a few inches apart on your backing sheet.  If the nuts or chips crumble out, simply press them back together.  

Bake, rotating the baking sheets midway through baking, until the cookies are lightly browned in the centers, about 10 minutes.  Let the cookies cool on the baking sheets until firm enough to handle, then transfer to a wire rack.  

Tuesday, March 4, 2014

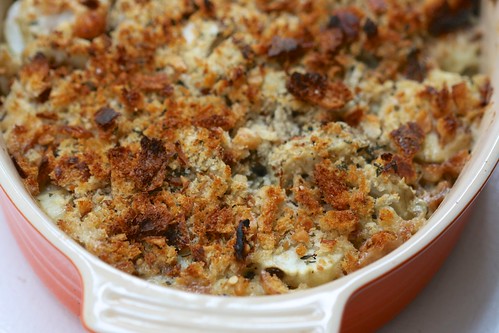
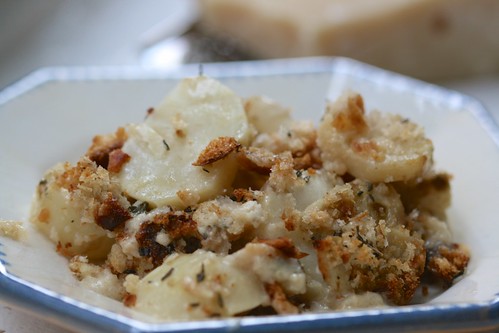
Baked Jerusalem Artichokes with Bread Crumbs, Thyme and Lemon

IMG_0435

I overheard a woman in the school yard yesterday saying how she was so bored with winter that she couldn't even find anything she wanted to eat.  It's easy to feel that sense of malaise in March, when winter feels interminable.  There may be a few more solid weeks of cold, so I'm trying to use this time to eat some really delicious warming foods.  Before long we will all be basking in the possibilities of really fresh salads and a new crop of Spring fruits and vegetables.

Sunroot, Jerusalem Artichoke, aka sunchoke.  It's not an artichoke, but it kind of tastes like one.  It's worth seeking it out and making this gratin before this winter passes us by, which surely it will.

IMG_0446

As tubers go, this one is pretty special, coming from a sunflower. Knobby like ginger, so it takes some persistence to peel.  But a little stick-to-itiveness sometimes makes a dish even more rewarding. 

Baked Jerusalem Artichokes, Bread Crumbs, Thyme and Lemon
From Jamie Oliver

This would be a great accompaniment to any roast meat or broiled fish. Don't slice the artichokes too thick or you will wind up baking the dish a lot longer than 30 minutes.

Serves 4-6
1 ⅓ cup heavy cream 
juice of 1 lemon
2 cloves of garlic, peeled and finely chopped
1 good handful of fresh thyme, leaves picked from stems and chopped
3 handfuls of grated Parmesan cheese
salt and freshly ground pepper
2 ¼ lbs Jerusalem artichokes, peeled and sliced as thick as a pencil
2 good handfuls of fresh bread crumbs (I made mine in a food processor using rosemary sourdough bread)
olive oil

Preheat your oven to 425 F.  In a bowl, mix your cream, lemon juice, garlic, half the thyme and most of the Parmesan and season well to taste.  Throw in the sliced Jerusalem artichokes.  Mix well and place everything in an ovenproof baking dish. 

Mix the breadcrumbs with the rest of the thyme and Parmesan and some salt and a little olive oil.  Bake in the oven for around 30 minutes, until the artichokes are tender and the bread crumbs are golden.  

Wednesday, February 26, 2014

Chocolate Chia Pudding

IMG_0424

Since December I've been turning to the same list of characters:  fish pie, shepherd's pie, soups, stews, casseroles and all other forms of warming, comfort foods.  To brighten things up, I rely heavily on citrus, namely navel orange segments and those luscious satsumas.  A vinegary kale salad from time to time also helps distract from the winter doldrums.

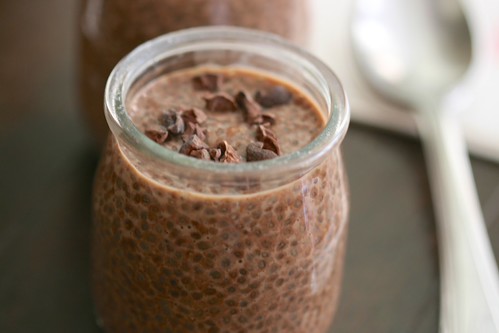
Chocolate is playing a starring role for me this winter.  Sometimes chocolate chips are snuck in greedy handfuls.  Then came a decadent treat in the form of Valentine's chocolates from Jaques Torres.  And finally, I tried my hand at a chia pudding, stirring in some rich bakers cocoa and topping it with raw cacao nibs.  Little treats come in many forms.

Chocolate Chia Pudding
Inspired by this recipe from Simple Bites
This is where healthy 'super food' meets indulgence.  I also made a breakfast version of this, substituting the chocolate for some cinnamon and nutmeg.  It's effortless to make- just combine the ingredients in a jar and shake it up, then chill for 4 hours, or overnight.  My version uses whole milk, because that's what we drink.  But this will work with any milk, including non-dairy nut milks or soy/rice milk.

⅓ cup chia seeds (I used black chia seeds)
1 ½ cups whole milk (or whatever type of milk you drink)
2 tablespoons maple syrup
1 teaspoon vanilla extract
2 tablespoons baking cocoa
Cacao nibs, optional

Combine all the ingredients in a pint jar.  Cover it with a lid and shake vigorously.  Chill for about an hour, then shake the jar again.  Let it chill for at least four hours or overnight.  Sprinkle with cacao nibs or shaved chocolate, or eat it as is.


Wednesday, January 29, 2014

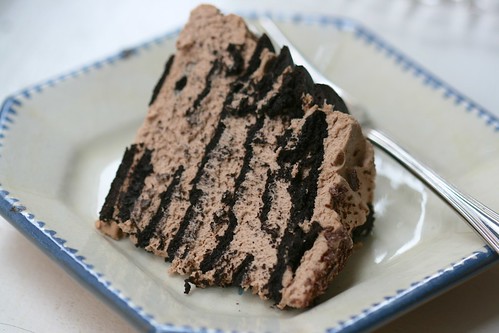
Chocolate Mascarpone Icebox Cake

IMG_0409
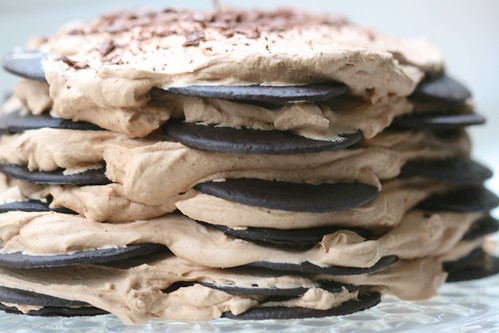
There is something about the way the mascarpone enriches the heavy cream, and softens the chocolate wafers without making them soggy... it's enough to make even this bitter winter fade away for just a while, leaving me fully content with this one perfect (yes, perfect) thing.

IMG_0421


Chocolate Mascarpone Icebox Cake
Adapted from The Magnolia Bakery Cookbook and Ina Garten's icebox cake

I made two of these recently for a friend's 1940's themed 40th birthday.  I used two springform pans like Ina Garten does, to be sure they would be neatly and safely transported via taxi cab.  But I admit I like the looks of this free-form somewhat messy cake, stacked just slightly off kilter.  Any cream you happen to have left over should go on top of a rich cup of hot chocolate.

2 cups heavy cream
8 ounces mascarpone
1 teaspoon vanilla
½ cup sugar
1 teaspoon instant espresso powder
2 tablespoons unsweetened cocoa powder
1 ½ packages Nabisco chocolate wafer cookies

In a large bowl whip the cream, mascarpone, vanilla, sugar, espresso powder and unsweetened cocoa powder until soft peaks form, being careful not to over whip.  To assemble the cake, on a flat plate at lease 9 inches in diameter, arrange seven chocolate wafers, with one wafer in the center and six wafers surrounding it.  Scoop about ¾ cup of cream onto the wafers, and holding them securely in place, gently spread the cream on top of them.  Continue to layer the wafers and the cream, making sure to end with a whipped cream layer on top.  Refrigerate for at least 5 hours, or overnight before cutting and serving.  Shave some good dark chocolate over top for a garnish.  

Wednesday, December 18, 2013

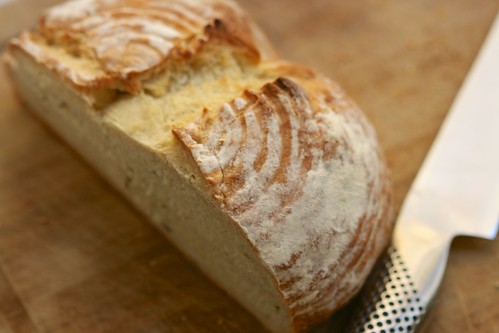
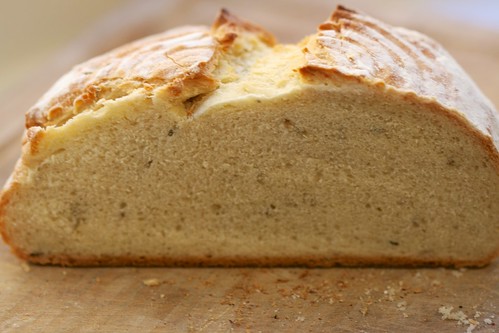
How to taste bread

IMG_0352 

 My friend's father was a baker.  I love how she describes the way he tasted bread.

"He would look at it, touch it, smell it, and then taste it... then look at it again," she said, tilting her head back the way he probably did, contemplative.  She had a serious look about her, considering the bread, lost in remembrance.

I could feel her longing for her father, but she seemed comforted, talking about him while she tasted a slice of my freshly baked loaf.  It reminded me of watching my mother adeptly forming rolls or a braided bread.  Or how as kids she took us in our pajamas to the Rockland Bakery in the wee hours because that was how much she loved their bread. Those details about a person that we hope remain engraved somewhere permanent.  And as for the bread, perhaps it helps us hold on.

 IMG_0357

Rosemary Boule
Makes one loaf. It is excellent as toast on the second and third day.

¾ cup water
2 teaspoons yeast
1 teaspoon sugar
1 teaspoon salt
2 to 2 ½ cups all purpose flour
2 tablespoons olive oil
2 teaspoons dried rosemary
cornmeal for dusting the pan

Combine ¾ cup warm water with 2 teaspoons of active dry yeast and one teaspoon of sugar.
Allow to proof for several minutes.
Measure 2 cups all-purpose flour into a mixing bowl, along with 1 teaspoon of fine salt, 2 tablespoons of olive oil and 2 teaspoons of crumbled, dried rosemary.  Stir to combine.  
Add the yeast mixture to the flour and stir with a wooden spoon.
Turn this out onto a clean but floured countertop and knead for 3-4 minutes, adding in additional flour as needed until the dough is not too sticky but not too firm.  
Oil the same mixing bowl with olive oil and put the dough in the bowl to rise, covered with a dish towel, for about an hour.
Punch down the dough.  If you have a banneton, you can use it for the second rising, also an hour.  Without a banneton, form the dough into a round loaf and let it rise on a baking sheet coated with corn meal.
Bake in a preheated 425 degree oven for about 20 minutes.  The loaf is done when it sounds hollow when tapping on the bottom.

Wednesday, November 27, 2013

Libby's Hot Waffles

Libby's Waffles

I've had this image in my head lately of the 1950's housewife.  For background, I've been stuck inside for six days with a sick child, vacuuming copious amounts of NYC dust like crazy, reaching into my secret stash of chocolate (my version of mommy's little helper.)  But this morning it seemed we had all turned a corner.  Cheeks were rosy again, spirits were higher, and I thought of making waffles.  Instead of our usual, whole wheat, flax-filled waffles, I pulled out my tattered copy of the Good Housekeeping Cook Book that belonged to my Grandmother.  There, circled in purple pen by my own mother, was the waffle recipe I remember from my childhood.

And for the first time, my little family happily gobbled up white waffles- just regular flour, sugar, butter, eggs and milk.  Boy were they good.  Then, to redeem my feelings of failure over having reached the end of my rope a couple times over the last few days, I pulled out the glue and glitter and built my kids a Broadway Local train.  

The R Train

I've listened to other mom's lament that they lost part of their identity when they chose to stay home with their kids.  I can't look at things in that light.  Learning to be a mother and to organize and protect and wipe noses and shlep, I gained a whole new identity, certainly.  It's not all about flax and veggies and overachieving.  What will these boys remember about these years together?  I guess when we judge the adults who raised us, it's best to think that we all do our best.  And hopefully, we remember eating well.

Libby's Hot Waffles
Adapted from GoodHousekeeping Cookbook copyright 1955
Makes 4-6 waffles.  We prefer real maple syrup.  You can follow the steps below, which I copied from the cookbook, or I find the recipe works just as well if you throw all the ingredients into a blender, saving time and energy!

1 ½ cups sifted all purpose flour
3 teaspoons double acting baking powder
½ teaspoon salt
2 teaspoons sugar
1 to 1 ½ cups milk (I use 1, but you can use an additional ½ cup for a more liquid batter)
2 eggs, separated
¼ cup melted butter

1. Start heating waffle iron.
2. Into large bowl, sift flour, baking powder, salt, sugar.
3. Slowly stir in milk, beaten egg yolks, then melted butter.
4. Beat the egg whites stiff, then fold in to batter.
5. Pour batter into center of lower half until it spreads about 1" from edges. Bring cover down gently. Do not raise the cover while baking.
6. When waffle is done, lift cover, loosen waffle with fork, serve at once.  

Wednesday, October 23, 2013

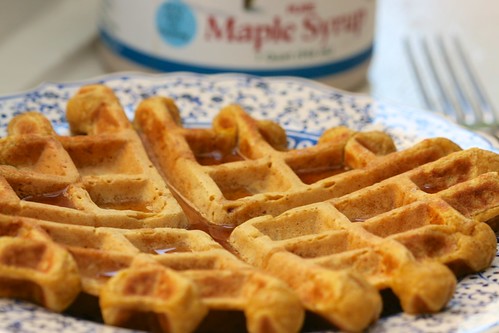
Pumpkin Waffles

IMG_0236

Mornings we rise early, in the dark.  Famished, thirsty. Full of anticipation for another day to begin. Dogs bark, trucks roar, the street sweeper whirrs, the garbage trucks open and close their huge crushing jaws.  We are not alone in the city that never sleeps.  Certain things are predictable and even wonderful. The city wheels go round this way.

IMG_0211

I try to remind myself to embrace these painfully early hours as part of the natural rhythm of our life right now.  Change what we can, accept what we can't change.  Eating good things, especially with a good dose of pure maple syrup, helps.  Wholesome, freshly pureed pumpkin makes me feel I've gone the extra mile for all of us. A little care for the caregiver.
IMG_0220

Pumpkin Waffles
Makes 4 to 6 waffles, depending on size.

1 1/2 cups all purpose flour (sometimes I use white-whole-wheat flour)
2 teaspoons baking powder
1 teaspoon cinnamon
2 eggs
3/4 cup milk
1/4 cup melted butter or olive oil (if you use olive oil, add 1 tablespoon sugar to the mix)
1 cup pumpkin puree (homemade or canned is fine...)

In a medium bowl, combine flour, baking powder, cinnamon and stir with a whisk.  Beat the eggs and add them to the dry ingredients along with the milk and butter or oil.  Stir in the pumpkin and combine well.  Heat up your waffle iron and go to it!  Serve with real maple syrup.

Saturday, October 12, 2013

Green with Envy

IMG_0193

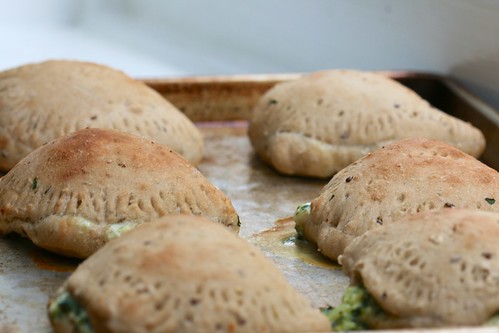
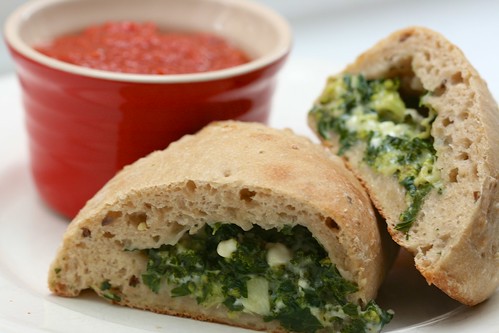
I've been on a calzone-making kick for about six months.  When I discovered it was an easy way to get Roman to eat greens, calzone became part of my dinner rotation.  I love picking him up from school and hearing his excitement when I tell him what's for dinner.  

Calzone are also great for lunch, even at room temperature, when we're too busy playing outside in the beautiful Fall weather to come home. A woman at the park asked me where I had bought them, and when I replied I had made them, she acted like I was bragging (no judgement, but her own child was enjoying a Happy Meal). "This is what I do, I can teach you, if you want" I told her, playing it down.  There is a perception that making your own dough is hard.  Time consuming, maybe, but hard, not particularly.  It all depends on what you want to do with your time.
IMG_0199

Lately, I've been putting more energy into making things from scratch.  If you read labels, even when you think you're buying something "healthy," there are still a lot of additives, and usually I don't know what they are or why they are in there.  I love the control of preparing something myself, even if it means coming home an hour early from the park, or a few extra dishes to wash.  It's worth it to me.  And secretly, well, maybe part of me enjoys being called a show off.  There are worse things, for sure.

Healthy Green Calzone
Makes 6 large calzone.
I adapted this recipe from one my mother used to make.  She used ricotta and spinach, which is creamy and decadent.  Lately, I have been using 4% cottage cheese, and a trio of spinach, kale and broccoli.  It makes me a little giddy to see Roman gobble it up.  He loves to dip his in marinara or pasta sauce.

The dough:
1 packet active dry yeast
1 cup lukewarm water
2 teaspoons honey or maple syrup
1 1/2 teaspoons salt
1 1/2 cups unbleached white flour
1 1/2 cups whole wheat flour
3 tablespoons olive oil

Combine the yeast, water and honey in a large bowl.  Stir, then let it sit for 5 minutes.
Beat in salt and flours.  Use a wooden spoon until it is too thick to mix, then turn it out onto a floured countertop.  Knead until smooth, about 3 - 5 minutes.
Grease the same large bowl with olive oil.  Return the dough to the bowl and make turn the dough to coat it with olive oil.  Cover the bowl with a dish towel and let the dough rise in a warm place until doubled in bulk, about 1 hour.

Prepare the filling while the dough rises.

Punch the dough to deflate it and turn it out onto the floured countertop.  
Divide it into 6 equal parts and knead each part into a ball.  
Roll each ball into a circle about 1/8 inch thick.  Place 1/6 of the filling onto one side of the circle.  Bring the other side of the dough over the top of the filling and seal the edges, pressing down with the tines of a fork.  Prick the top with a fork to allow steam to release while cooking.  Place it on a greased baking tray.

Bake for 20 minutes at 450 degrees and serve, with marinara or pasta sauce for dipping.


The filling:
1/2 a yellow onion, finely diced
2 cloves of garlic, diced
3 cups of fresh baby spinach, roughly chopped
1 cup broccoli florets, cut into tiny pieces (I did not use the stalk).
1 cup of kale, center stalk removed, finely chopped
1 cup 4% cottage cheese
1 cup shredded mozzarella cheese
1/4 cup grated parmesan

In a large pan, heat some olive oil and sautĂ© the onion and garlic for a few minutes over medium heat.  Add the greens and 1/4 cup water and cover.  Cook until the greens wilt, then uncover the pan to evaporate the water.  Turn off the heat and add the cheeses.  


Sunday, October 6, 2013

The boy with the silver fork

Ethan turned one in September and because the first year of life rapidly boiled away, I've been trying to keep things simmering on low for a while.  I catch myself staring at the boys with melancholy.  If only I could press a mental record button and remember them forever this way-- Ethan with his arms up, teetering ever so sweetly around the house, his big brother behind him, imitating his swagger.  But things change daily, before our eyes.

IMG_0165

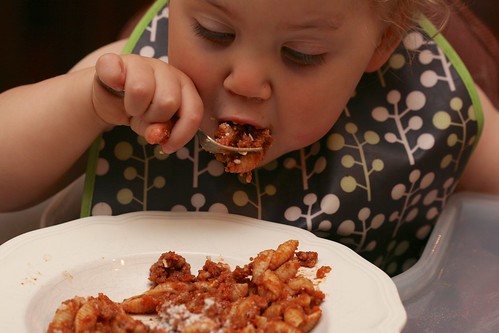
Some time ago, I published Roman's favorite meat sauce and it continues to grow in popularity, amongst family and friends.  I make bigger batches now that we have two growing boys. The recipe has changed, as have our lives since we went from three to four.  

IMG_0171

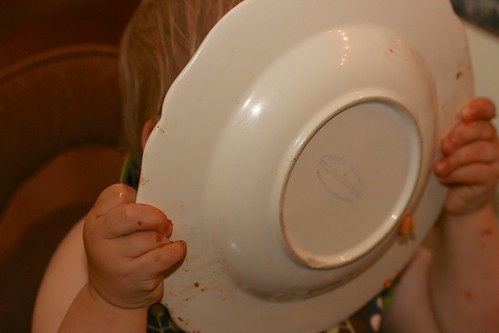
If you're currently feeding a baby, my advice is to let your baby take the lead.  Babies should be allowed to hold a spoon or fork, eat off a real plate or bowl, and drink from a cup with no cover.  They are perfectly capable, with practice.  By 9 months, Ethan could feed himself with a spoon.  Eating is a sensory experience, and babies need to learn to chew and develop those important mouth and jaw muscles (purees don't teach them that). Babies are capable of so much and shouldn't be underestimated.  

The same could be said for feeding older children.  I try to respect Roman's right to listen to his body, to know when he's hungry or full, and to tell me what he likes and doesn't like.  He often surprises me.  Last week he asked for spinach in his chicken noodle soup last week and begged for whole branzino instead of fish filets.

And so we go on, each day another chance to try something new, to like it or dislike it and to respect choices.  Pretty important with a four year old.  It's all a learning process, for me as much as for them.  

IMG_0182

Bolognese, Part II

These days, our bolognese has a ratio of at least 4 cups of vegetables to 1 lb. of meat.  I never make it quite the same, but this is our favorite family meal because it pleases even the harshest of little critics.
The amounts below for vegetables are suggestions.  This is made to be adapted.  Add spinach and kale, red pepper, or whatever you have in your refrigerator.  I have made probably fifty versions and no one has ever said 'yuck'.   Here is one of our favorite combinations.

1 yellow onion
3 garlic cloves
2 carrots
2 stalks celery
1 yellow squash
1 zucchini
1 cup broccoli (the stalk)
1  box button mushrooms
1-2 teaspoons herbes de provence
1 to 1 1/2 lb ground beef, or a combination of pork, beef and veal
1 box Pomi (Italian brand) strained tomato
1 cup water
salt to taste
fresh parmesan

Using a food processor, finely chop the onion, garlic, carrot and celery.  In a large pot, cook these over medium heat for five minutes in a Tablespoon of olive oil.  Continue to process the rest of the vegetables in batches, adding them to the pot to cook.  Add the herbs and some salt if you desire, and cook for about 7-10 minutes.  Push the vegetables to the side of the pan (or you can take them out if your pan is not big enough) and add the meat.  Brown the meat for several minutes, breaking it up with a wooden spoon.  When it is browned, combine the vegetables into the meat and pour in the strained tomato and water.  Lower the heat to medium-low and cook for about 1 1/2 hours, stirring every so often so it doesn't stick to the bottom of the pot.  It is done when the liquid has mostly been absorbed.  Serve with your favorite pasta and top with fresh parmesan.

Wednesday, October 2, 2013

Pumpkin Cauliflower Macaroni and Cheese

IMG_0155

I don't think the word lazy has ever been used to describe me.  Sometimes I take shortcuts like buying canned pumpkin.  Although I prefer the old fashioned route (which also happens to be healthier).   I was actually pleased when Whole Foods ran out of solid pack pumpkin last weekend.  It gave me the impetus I needed to make my own.  

So Monday morning before 8 am, I had peeled, seeded, cut into chunks, steamed and pureed in the food processor a whole sugar pumpkin.  Because another thing about me: I am always up early, as in hours before the sun- early (thank you, children).  It was nice to make good use of the time.

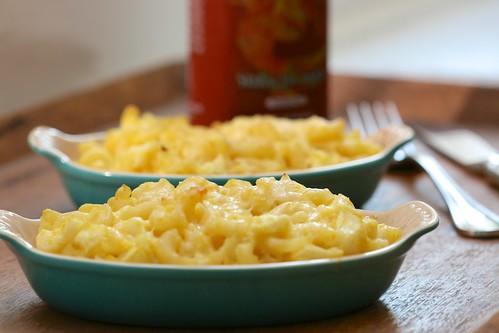
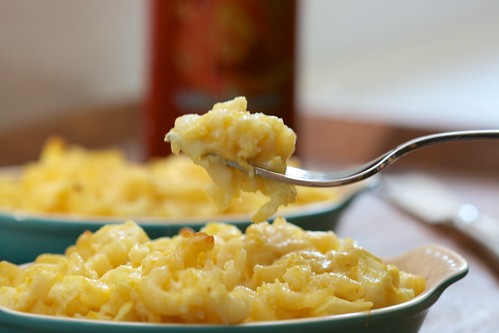
The resulting pumpkin has gone into fluffy pumpkin waffles and hearty muffins this week.  It also made a tasty appearance in this mac and cheese, which Roman, Ethan and I gobbled up at 9:30 am, because when you've been up since 5, lunchtime can come very early.  For our hungry tummies, it was a welcome treat to refuel until second lunch.

IMG_0163

Creamy Pumpkin Cauliflower Macaroni and Cheese

I used the absorption method for the pasta (it's like making risotto)-- adding water and stirring until the macaroni is cooked.  The pasta releases its starch and makes for a creamier dish.


1 Tablespoon olive oil
2 shallots or 1/2 an onion, diced
2 cloves of garlic, diced
1 head of cauliflower, remove stalk and finely chop
1/2 bag of elbow macaroni (8 ounces)
2 cups of water (estimated)
1 1/2 cups pumpkin puree (you could also use butternut or acorn squash, steamed and pureed)
1 cup shredded whole milk mozzarella cheese
1/4 cup freshly grated parmesan
1/4 tsp salt

Sauté the shallots and garlic in a tablespoon of olive oil.
Add the cauliflower and cook for several minutes over medium heat.  
Add the raw macaroni.  Add 1 cup of water and stir, bringing to a boil and adding more water little by little, as needed until the pasta is tender. When the pasta is done (cauliflower should be tender by this time), stir in the pumpkin puree and remove from heat.  Pour this into a baking dish and stir in the mozzarella cheese and salt.  You can make the dish ahead to this point and keep it refrigerated until before dinner.  When ready to bake, top with parmesan and bake at 375 for about 20 minutes or until it begins to brown slightly. 

Friday, September 27, 2013

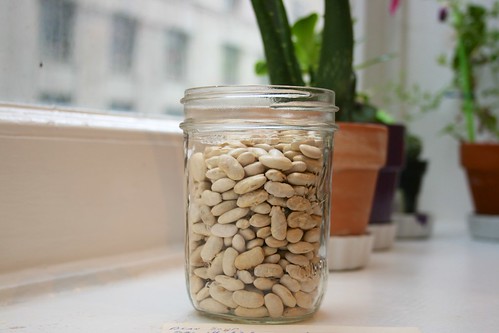
A Simple White Bean Soup

IMG_0105

In my family, there is not much left of lore.  But those little stories that remain, linger in my mind. My mother used to tell the story of how my grandmother Ruth hated soup.  Her father Abraham, wished upon her a husband that loved it.  And indeed, my grandfather Leo was a soup lover.  Somehow Ruth grew to accept and embrace whatever it was that she hated about soup.   Her recipe box reveals that she made cold and hot, foreign and domestic versions of the stuff.  Minted Pea, Vichyssoise, Cold Cream of Curried Chicken, and Potato Chowder.

IMG_0090

Shuffling through her box and finding the recipe card for 'Bean Soup' made me think of wandering through a flea market a few years ago.  In a small stall next to some old tarnished silverware, I stared down at a large box full of black and white photographs.  Unclaimed photos of people, their names and stories lost in time.  If I'd never rescued Ruth's recipe box from my father's attic, all of those recipes would have become as irrelevant as the old photographs.  Life, and everything it's filled with: people, travels, meals, stories, and the photographs by which we hope to remember it all--just as ephemeral as a bowl of soup. We'd better dig in.

Ruth's Bean Soup (as written by Ruth)

Soak 1 lb white beans overnight. Drain and add ham bone and 3 quarts water.
Simmer, covered, 2 hrs.
Then add 3 onions, 3 stalks of celery w. tops
all finely chopped, 1 c. mashed potatoes
2 minced cl garlic and 1/4 c. chopped parsley
Simmer another hr- remove bone, dice meat.

Serves 6-8 or 4 for one dish supper.

(My notes: I only used 2 onions.  I finely diced them, along with the celery and garlic cloves, in the food processor.  When I removed the ham bone to dice the meat, I pureed about 2 cups of the soup in the food processor.  Ruth called for mashed potatoes, but I added one russet potato, peeled and chopped. Fresh rosemary made a delicious garnish.)

Tuesday, August 20, 2013

Thai Cabbage Salad and why I love bowls...

IMG_0079

I love bowls.  Particularly hand thrown pottery. It has a soft, sturdy, personal feel.  
Bowls are the obvious and reliable vessel for soup, porridge, stew, curry.  But they can also feel smart and out of the ordinary for a large square of lasagna, or a piece of chocolate cake- with or without ice cream.   

To me, eating a salad on a plate feels frustrating and unwieldy.  There's bound to be some cabbage or a stray scallion on the floor if you attempt it.  But put that same heap of salad in a good sized bowl and the leaves will never topple overboard.  The sides of the bowl help you maneuver every last bit. The food feels cherished when eaten from a bowl.  As well  it should.

Thai Cabbage Salad
from Marlena Spieler's Hot and Spicy Cookbook 1985

I recommend serving immediately once the salad is dressed to avoid a soggy salad.  If you want to prepare the vegetables in advance simply wait to add the dressing.  Spicy, crunchy, fresh and summery. 

Serves 4 to 6

1/3 cup vegetable oil (I used peanut)
1/3 cup distilled white vinegar
3 tablespoons sugar
3 tablespoons soy sauce
1 cup chopped cilantro
1 to 2 tablespoons red salsa or 1 teaspoon chile-garlic paste
4 cloves garlic, chopped
2 serrano chiles, thinly sliced
1 head green cabbage, shredded or very thinly sliced
1/2 cucumber, peeled and diced
1/2 carrot, shredded
1 cup dry-roasted peanuts, coarsely chopped
5 green onions, chopped
1/2 red bell pepper for garnish

1. Combine oil, vinegar, sugar, soy sauce, cilantro salsa, garlic and chiles.
2. Pour the mixture over the cabbage, cucumber, and carrot. 
3. Toss with chopped peanuts, green onions and garnish with red bell peppers.  

Wednesday, August 14, 2013

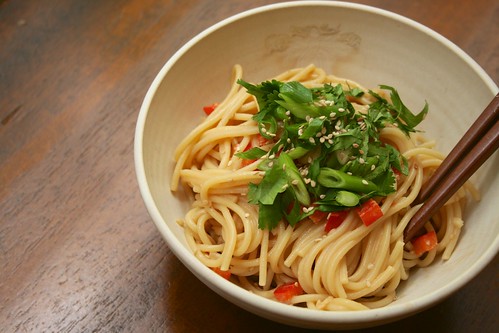
Cold Sesame (Garlicky) Noodles

IMG_0071

For almost a year, since the birth of my second son, I've been cooking for the lowest common denominator, meaning my three year old.  My husband and I reach for the hot sauce to make things more suitable to our palate. I'm not talking chicken nuggets and fries here...I pack as many vegetables into the food processor as I can, sautĂ©, add coconut milk or tomatoes, simmer with some fish- you get the idea.  Roman will generally accept this type of preparation over rice or pasta, and I feel like it's a healthy enough way to ensure he's getting nutrients without forcing foods on him.  But lately I would like to regain a bit of my adult identity and I've started to think about the foods that can help me do that.
It's funny to think about being able to eat whatever I want, do whatever I want, wear what I please again. Everything has become tailored to my marathon days of schlepping two kids around the city. From park to park, then home again, we eat a lot of pb&j's, pizza, hummus and cucumber, muffins, things that are easy to tote around. So when I thought about making these cold sesame noodles, Roman (almost 4) was not who I had in mind to be the consumer. However, when there is pasta involved, he perked right up with interest and before I knew it he was reaching for his own bowl-- teaching me that the more chances I give him to like something out of his comfort zone, the more he might surprise me. Because parenting is, after all, full of surprises.

There are those dishes that tempt a brave palate.  If you value the taste experience and don't mind the way raw garlic tends to linger, this is a dish you are likely to enjoy.  
Fresh garlic stirred into silky sesame noodles, chilled for a delightful summer meal.  
Eat it with people you love and you won't have to be concerned about the aftermath of the raw garlic.  

Cold Noodles with Sesame Sauce
A recipe my mom used to make, with the addition of red bell pepper because it's still hard for me to think about eating something without a vegetable.
1 lb. linguine or spaghetti
1 teaspoon plus 1 tablespoon sesame oil
1/4 cup sesame paste
3 tablespoons brewed tea or water
2 tablespoon chili oil (optional but recommended!)
3 tablespoons light soy sauce
3 tablespoons red wine vinegar
2 teaspoons sugar
Salt to taste
1/4 cup peanut oil
2 tablespoons chopped garlic
1 red bell pepper, diced (optional)
Sliced scallions and cilantro for garnish
1 tablespoon sesame seeds for garnish

 Boil six cups of water and cook the noodles until tender. Drain and run cold water over them to chill them. Sprinkle with the teaspoon of sesame oil. To make the sauce, place the sesame paste in a bowl and add the tea or water, stirring with chopsticks or a fork. Stir in the remaining ingredients and the 1 tablespoon sesame oil. Toss the noodles in the sauce and red bell pepper, if using. Serve cold, garnished with fresh scallions, cilantro and sesame seeds.


Tuesday, June 11, 2013

Spicy Mango Black Bean Salad with Roasted Corn

IMG_0042

In a few weeks, we will be in Massachusetts.  Applying sunscreen, bug repellent, rinsing out bathing suits, licking ice pops, splashing in a baby pool.  Waiting for the corn to grow as high as an elephant's eye, see our laundry blow in the breeze, feel the cool grass sneak up between my toes, slightly prickly but also sort of soft.  Natural grass, not the very manicured kind, a nice shade of green.

Dad is positioned by the grill, watching it all. We are definitely singing.  Maybe he throws on some kabobs with marinated shrimp, certainly a sausage or two.  "Janma" offers me a glass of chilled white wine.  She takes Ethan and bounces him on her lap, making him laugh with paddy cake.  Lisa and the cousins come over and beach balls fly in the yard.  The kids start a game of badminton.  Yes, we should do that this year.  Dirty feet climb up onto the deck for dinner.

Perhaps we'll get to stay up late enough to see the fireflies come out.  I wonder what time they appear.

IMG_0051

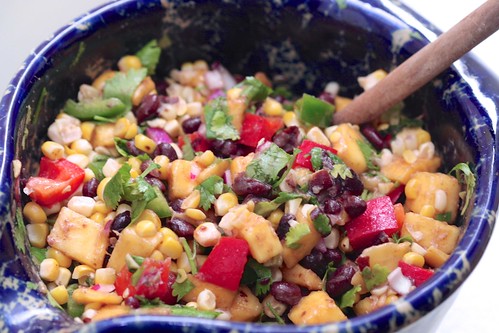
Spicy Mango Black Bean Salad with Roasted Corn
Lime juice, cumin, cilantro and heat from jalapeño peppers make this salad highly satisfying for sophisticated (grown up) palates.  Enjoy with any grilled fish, chicken, or pork on a gorgeous summer night.

1/2 red onion (about 1/2 cup)
Juice of 1-2 limes
1 red pepper
2 jalapeño peppers (start with one, or go for two if you like a lot of heat)
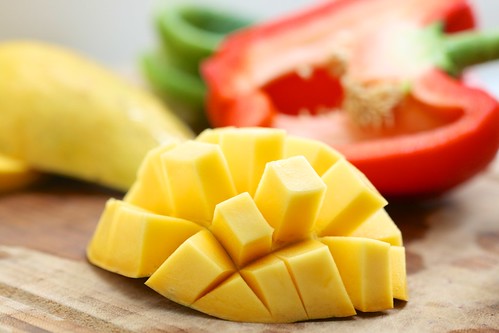
2 ripe mangoes
1 can of black beans, rinsed
2 ears of fresh corn
1 handful of cilantro
1 teaspoon ground cumin
1/2 teaspoon fine sea salt
2 Tablespoons of good olive oil

Dice the red onion and let it soak in the lime juice for several minutes.  Add the diced red peppers, jalapeño peppers (remove the seeds, or leave them in for full heat.) Cube the mangoes, add the rinsed beans.  Shuck and roast the corn either on a grill or grill pan for several minutes.  (If you can't do this, just microwave it for two minutes and run it under cold water to cool it.)  Cut the corn off the cobs and add to the salad.  Chop the cilantro, then stir it in with the cumin and salt.  Drizzle in the olive oil and stir to combine all the ingredients.  Serve immediately or chill slightly.  

Saturday, June 1, 2013

Finding Italy in New York

Two years ago, we moved from Rome to New York City.  As we were getting settled in Manhattan, a friend mentioned I should write a post about finding Italy in New York.  Little Italy, Eataly, Buon Italia in Chelsea Market.  Sounded like a great idea to me.  Over the last two years, I visited those places when I needed an ingredient, but pushing through the tourists and making eye-contact with no one was a far cry from my stomping grounds in Rome.  The missing ingredient was not culinary.  It was human.

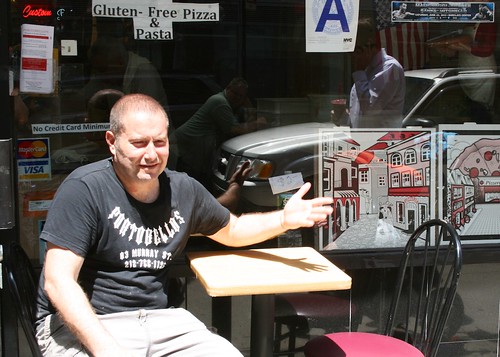
  Portobellos

Then Roman and I stumbled upon Portobello's- our neighborhood pizzeria.  It wasn't long before Anthony, the owner, knew our names and we felt like friends.  This was the missing piece - humanity is not something you feel every day on the streets of New York City.  Southern Italian warmth cuts through the crush of strangers.   Someone commenting on Roman's growth, cracking jokes with him, treating him like he matters.  These are the things I missed most about Rome.

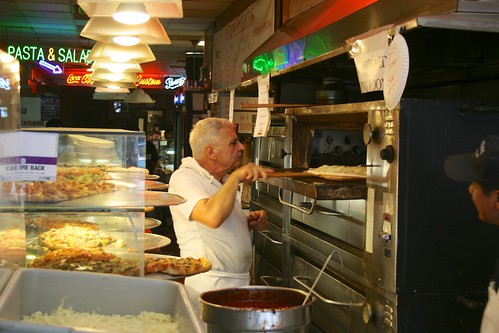
Facendo la pizza

Portobello's makes great pizza- that quintessential New York slice, that once you've tasted it, there is no substitute.  But it's also a place where we are not anonymous customers.  We feel at home there, and it's the reason why when it's time to go, we will miss New York City, too.

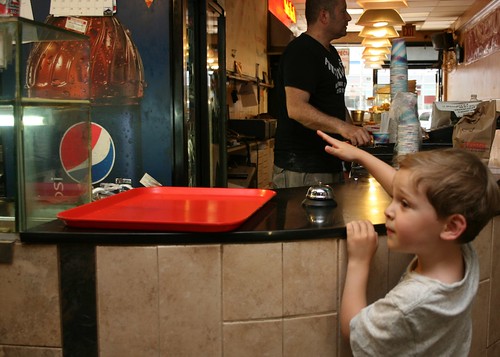
Order Up!


IMG_0022

Anthony and the boys

Next time you're in downtown NY, stop in and have a slice.  Tell him Nicole sent you.

Portobello's Pizzeria and Sicilian Kitchen
83 Murray Street, Tribeca

Thursday, May 30, 2013

A Simple No Bake Fruit Tart

IMG_0020

We returned from a morning outing at the park and made this together, Roman and I, while baby Ethan crawled backwards and performed yoga poses.  He's figuring out motion.  I've been at a loss for words lately but I'm not ready to let And Baby Cakes Three die. So I'm offering this tart which is OK to eat for breakfast, but also wears the dessert hat nicely. It seems like summer on the East Coast will be another hot one, so please make and enjoy. There's no room for feelings of guilt.

Simple No Bake Fruit Tart
Inspired by a Nigella Lawson recipe
A truly versatile tart.  Instead of yogurt you could use lemon curd or chocolate pudding, and whatever fruit strikes your fancy.

10 graham crackers
6 Tbsp unsalted butter, melted
2 yogurts (I suggest whole milk yogurt. I love Liberté brand which is made with milk and cream. I used one vanilla and one coconut but you can use whatever you like.)
Mixed seasonal fruit

Pulse the crackers in a food processor. Add the melted butter and continue to pulse. Use your hands to press the crushed crackers into a 1" tart pan with removable bottom. Place the crust in the freezer for at least an hour but preferably two. Fill with yogurt and top with fruit. 

Saturday, April 13, 2013

A request

Baba Ghannoush

"Baba," he said, over and over.

I figured he either meant baba au rum or baba ghannoush.  But rum is not for babies.

He loved it.

Ethan eats baba ghannoush

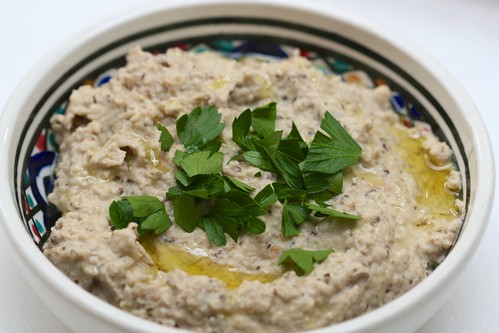
Baba Ghannoush
Delicious served with fresh baguette, raw vegetables, or by the spoonful.

1 large or 2 small eggplants
4 cloves of garlic
juice of one lemon
4-6 tablespoons sesame tahini, depending on taste
a few tablespoons of water
1/2 teaspoon salt 
a drizzle olive oil
parsley, optional

Preheat the oven to 350 and cut off the stems of the eggplant.  Roast them until soft and partially collapsed, anywhere from 40 minutes to an hour.  Place the garlic cloves in an aluminum foil packet and roast along with the eggplant.  Cut the eggplant open and scrape out the flesh.  Discard skin.
Place the eggplant, garlic, lemon juice, tahini, and salt in the food processor and pulse until combined and creamy.  Add salt to taste and water if necessary to desired creaminess. Chill for several hours. Pour olive oil on top of dip before serving.

Tuesday, March 19, 2013

A balm for March

IMG_9717

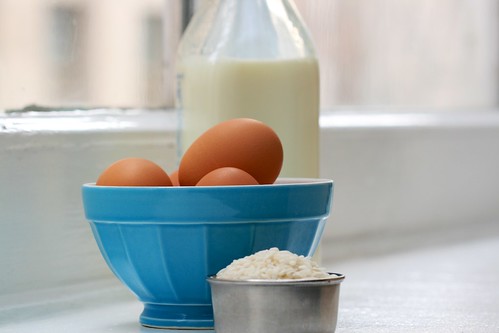
A cold March morning summoned me to the kitchen for something comforting.  I reached for Ruth's recipe box and found three different recipes for rice pudding.  I chose the one with the most eggs, six.  I had never tried this recipe, which is made in the oven, not the stove top.  That would be nice, I thought, not to have to skim away the skin that forms as the milk boils.  Out came a nice quart of milk, a retro glass bottle I had bought recently, thinking of Ruth and how she must have bought her milk.  I was feeling cozier already.  

As I made my way through the shorthand recipe- cooking the rice till firm, separating the eggs, beating the yolks till thick and lemony, I felt confident in my ability.  I beat the whites until foamy.  Maybe I over beat them, yes I think that's where I went wrong.  Combining the whites with the rice and yolks, I found they would not fold in properly.  They ended up sitting, floating on top of the pudding.  This is stupid, I thought. Why couldn't Ruth have been more explicit? Should I have used a whisk or a spatula? Just how foamy did she mean?

I was not about to waste organic eggs and milk.  I would eat the pudding myself but just not share the recipe.  For the rest of the day my thoughts turned deeper, from this kitchen mishap to what I've missed the most in the two and a half decades or more without my mother and grandmother.  Tangible things like visits, phone calls, letters, one of those hugs. Advice on cooking, advice on child rearing and relationships.  Anecdotes of how to get through the day to day.  Stories of their pregnancies, their childbirths.  Intangibles like knowing that a source of support exists, pulling for me. 

Then I realized that having an incomplete recipe is just a metaphor for that missing link to my past, that hole I've felt all these years.  "Figure it out" is basically how her recipes are written.  Figuring it out is what I've been doing all these years.  When you don't have someone to spell it out and guide you, the result must be resilience.  

-For Lisa and Alexandra, the most resilient of all.

Monday, February 11, 2013

Grilled Cheese

IMG_9032

It's funny how there are many lessons our parents teach us without trying.  Growing up around a man who blasted opera in the house every Sunday so loud the neighbors had to shut their windows was  desperately embarrassing.  He always had a song, either whistling or singing in public.  I remember how much this annoyed me as a teenager.  However, these things have a way of rubbing off on a person.  Now singing is a tool I use to calm my nerves or lighten my mood.  It costs absolutely nothing and if I really get into it, I might even get someone to join in.

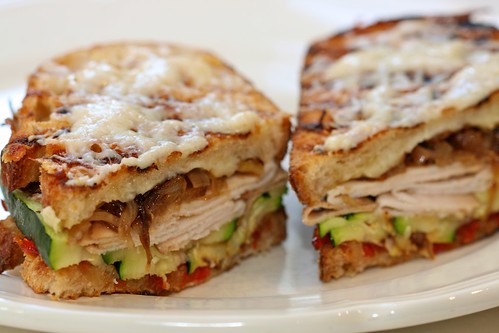
He also exposed me to the art of making great grilled cheese sandwiches.  It involves a good amount of resourcefulness, finding flavorful treasures, objets trouvĂ©s to tuck inside the sandwich.   You need some zing in the way of a spicy mustard, or something pickled.  Sometimes the best sandwiches, (soups too) come from found objects.  No recipe, no planning, just bits and pieces pulled from the refrigerator. It's about versatility as much as flexibility.

Sometimes it's the unintentional lessons that prove most valuable.

Here is one of my own recent creations.
Here is what I used to make 2 extraordinary sandwiches:

4 slices of the best sourdough bread you can find (or make)
1 zucchini, sliced thinly lengthwise
4 shallots, sliced thinly
6 slices smoked turkey or ham (substitute extra vegetables if you don't eat deli meats.)
2 cheeses -  I suggest Parano, Gouda or Emmentaler for one and a harder cheese like parmesan for the second cheese.

Red pepper relish  (takes about 25 minutes to make, or you could use store bought) Alternately you could use a pesto or mustard.

Grill the zucchini slices on a grill pan, under the broiler or on an outdoor grill if you have access to one.
Saute the sliced shallots in olive oil until very soft.  Stir them frequently for about ten minutes.
Build your sandwiches by layering the ingredients on one side of the bread- relish, zucchini, turkey, shallots, one of the cheeses.  Grill the sandwiches on a grill pan or a frying pan (add butter to one side of the bread) and then transfer them to a baking sheet.  Grate the second cheese on top of the sandwich and finish in the oven at 375 for a few minutes to melt the cheese.
Related Posts Plugin for WordPress, Blogger...